Salesforce launches Dynamic Interactions – Easily create experiences with Low-Code Innovation
With Dynamic Interactions, go beyond buttons and use rich interactions to engage. It unlocks the potential for every app builder who is a noncoder to create interactive, responsive experiences with easy drag & drop functionality.
Dynamic Interactions are basically interactive components — such as a list, a data entry form, a chart, or a map. Once created by a developer, the admin can control how the component interacts with other components on the page and what action it should take, all this in the App Builder interface. Once the components have been created, you can use them as many times as necessary with no need for any additional work.
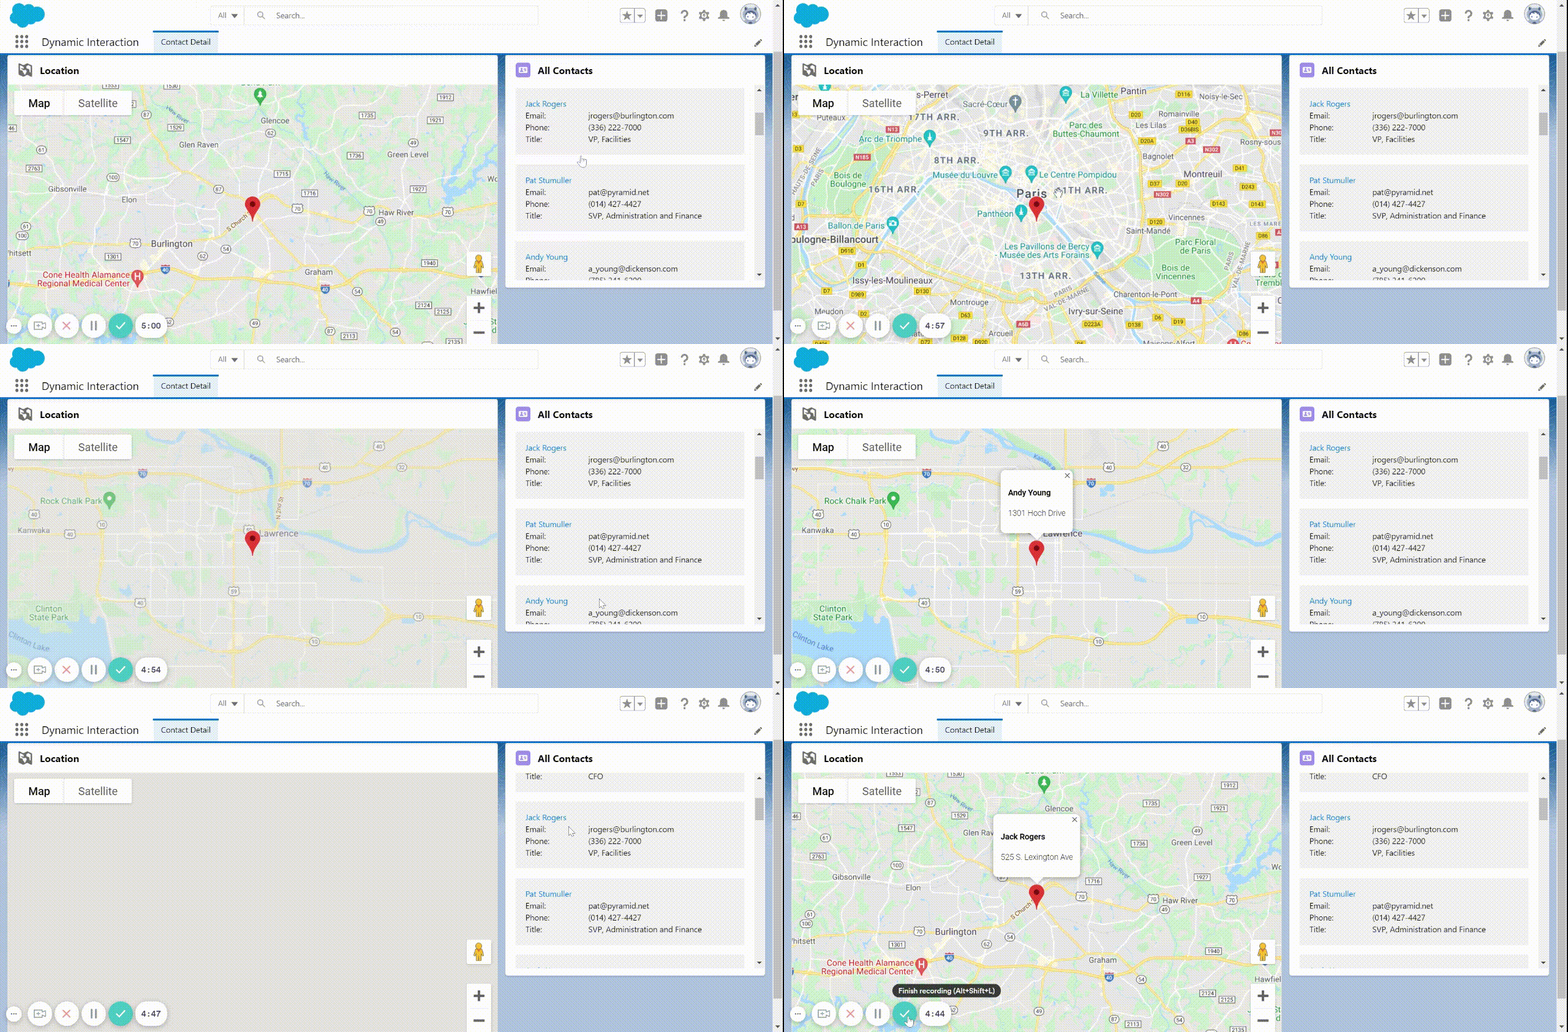
Dynamic Interactions - Easily create experiences with Low-Code Innovation
Using Dynamic Interactions, Contact Location can be seen on the Lightning Map Component.
Lightning Web Components in the picture
Dynamic interactions are a two-team effort in which both admins and developers have an equal part to work on. A custom source component is the key element for the entire process, with only Lightning Web Components (LWCs) being eligible for this role. However, any component, whether it is an Aura or LWC, can serve as a target.
In the further section, we will show you the steps to replicate the whole functionality.
Reference Codes
You can refer the codes of this whole functionality by going to our Bitbucket repository we have linked:
Dynamic Interaction — Bitbucket
Developer Task
Dynamic Interaction is a two-component interaction, for which one is the source and the other one is the target. So, for this we have created two LWC components with names given below:
listOfContacts
locateAddress
listOfContacts Component
First, we have created a listOfContacts component. We have invoked a function named “handlePassAddress()” with the click of a tile in the listOfContacts component. The function's definition can be viewed/displayed here.
A custom event i.e., “contactToPass” has to be dispatched over here. Also, notice how the details in the events are passes here, we will pass these details to the other component i.e., locateAddress.
Now we have to define this event in the listOfContacts.js-meta.xml file also. You can see below that how you have to define this event in the meta.xml file.
In the above code make sure that the apiVersion should be greater than 53.0.
locateAddress Component:
Now, in this component, we will fetch the details that we have passed from the listOfContacts component. For this we will first write the codes in the meta.xml file as displayed below:
And then using the @api decorator we can use it in the JavaScript file:
Admin Task
Now, Admin has to first add both the components first:
following that you click on the “Contact List” component you will see an “Interaction” tab. Once you go there you need to Add Interaction.
Once you click on the “Add Interaction” button you need to fill the target component. In our case “Contact List” is the source component and “Locate” is the target component. After selecting, you can see the screenshot:
Then, you need to map the components like this:
The components are all set up and ready for action. You can now click “Save,” which will finalize your page.
References
https://admin.salesforce.com/blog/2021/introducing-dynamic-interactions-the-latest-low-code-innovation-for-salesforce-platform
https://www.salesforce.com/news/stories/salesforce-launches-dynamic-interactions-new-low-code-innovation/
https://www.youtube.com/watch?v=LGCJiLdSOZQ


