

How to Migrate from Legacy Marketing Cloud Connect to the New Data Cloud-Native Connector
Key Summary:
Real-time data ingestion with Salesforce Data Cloud.
Proper Subscriber Key mapping and clean CRM synchronization are essential for successful integration.
Salesforce Data Cloud enhances segmentation, activation, and Customer 360 personalization.
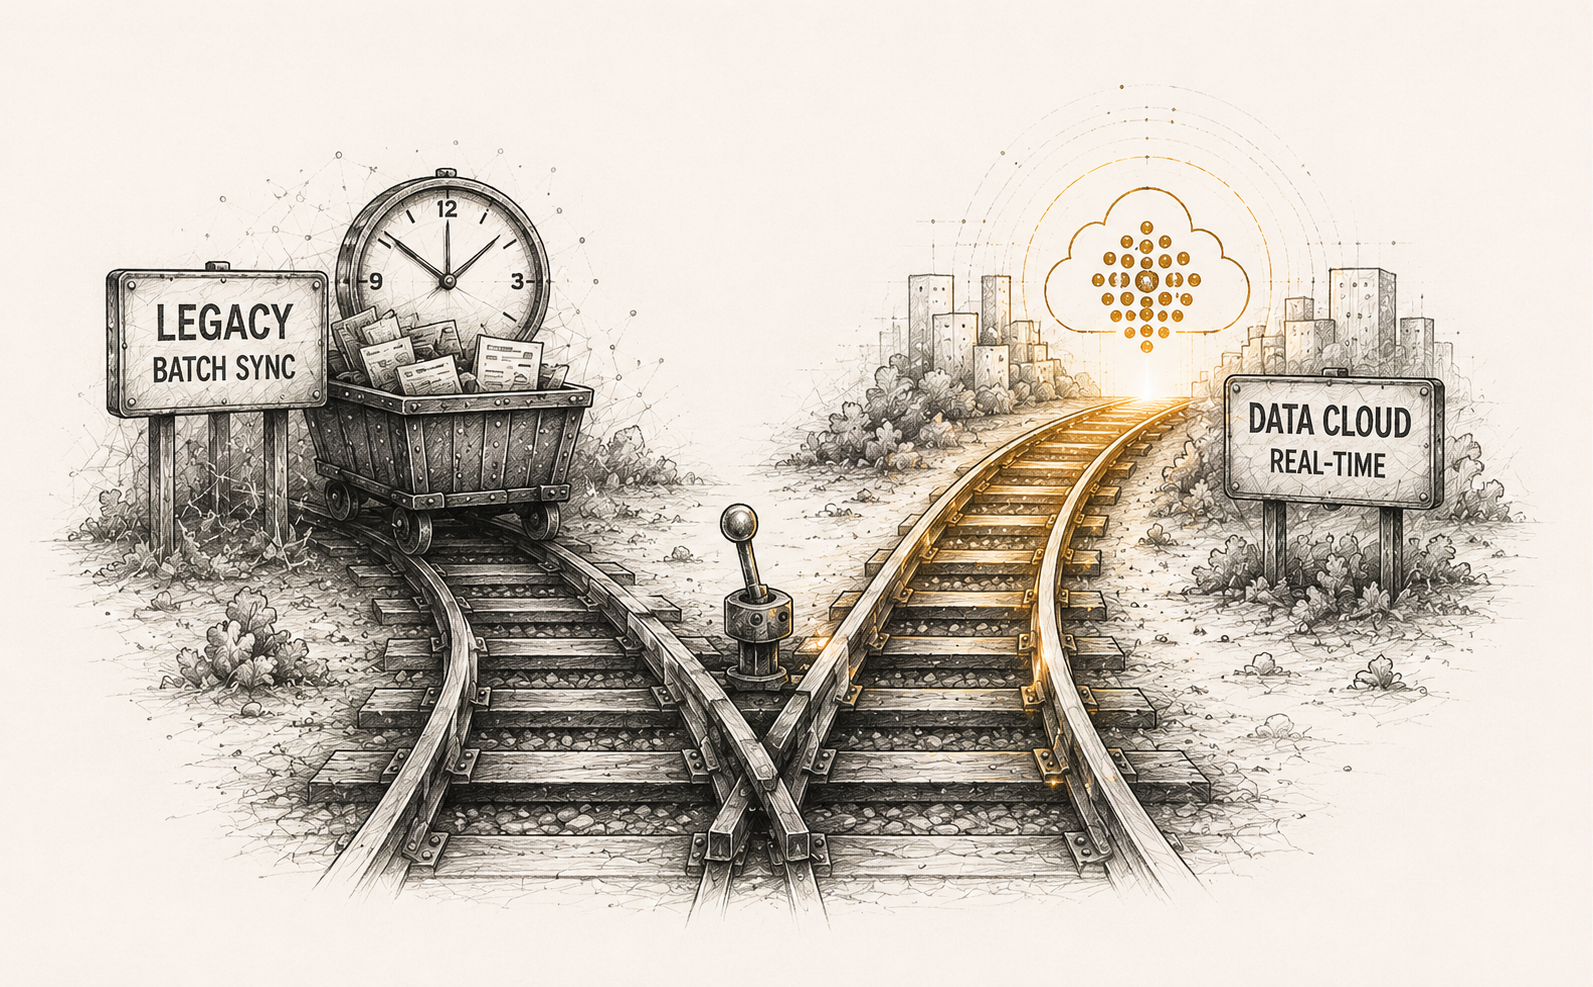
For years, Marketing Cloud Connect (MCC) has been the standard bridge connecting Salesforce CRM with marketing engagements. It has served teams well, but it relies on an older approach: installing a managed package, setting up tracking users, and waiting for hourly batch syncs to copy data back and forth into Synchronized Data Extensions.
In today’s world of real-time, personalized, and AI- driven marketing, waiting an hour for data to sync doesn’t cut it anymore. Enter the Salesforce Data Cloud native connector. This modern approach as direct, real -time data highway.
Instead of heavy data copying, it connects your system natively using Zero-ETL (Extract, Transform, Load) technology.
If your organization is ready to move away from batch and unlock real -time marketing, this guide will walk you through a simple, safe migration plan.
Understanding the Architecture Shift
To evaluate the strategic value of this transition, it is helpful to examine how data flows through each underlying framework under the broader Salesforce Customer 360 architecture:
The Legacy Architecture (MCC): This framework relies on an installed managed package to pull data from Salesforce CRM. Data ingestion occurs at scheduled intervals, physically duplicating relational records within Marketing Cloud storage via Synchronized Data Extensions. This process introduces data latency and increases storage overhead.
The Modern Setup (Data Cloud- native): Data Cloud acts as your central hub. Data streams instantly from your CRM via a Salesforce zero-copy integration. From there, it is organized via the Salesforce Data Cloud architecture and shared natively back to Marketing Cloud Engagement integration endpoints as clean, ready-to-use Shared Data Extensions. The following comparative breakdown highlights the core operational and architectural shifts between these two integration frameworks
| Feature | Legacy Connector (MCC) | New Data Cloud Connector |
|---|---|---|
| Data Speed | Scheduled batch syncs (Hourly delays) | Real-time / Near real-time data ingestion |
| System Strain | Physically copies and duplicates data | Connects data natively (Zero-ETL) |
| Setup Type | Complex Managed Packages & API users | Simple, point-and-click native connection |
| Segmentation | SQL queries and rigid filtering | Visual drag-and-drop / Einstein Segment AI |
Step-by-Step Migration Blueprint
Pre-Migration Checklist & Prerequisites
Before modifying your environment, complete these foundational assessment checkmarks:
Verify Cloud Ingestion Rights:
Confirm that your Data Cloud licenses are correctly provisioned and that your core Marketing Cloud Enterprise ID (EID) is fully accessible by your administrator account.
Audit Active Sync Paths:
Open your legacy MCC configuration and map out which CRM objects and fields are actively tied to live customer journeys or Automation Studio activities.
Establish a Coexistence Strategy:
Plan for a temporary parallel-running window where both connectors operate simultaneously. This allows you to audit record numbers, validate matching schemas, and verify delivery paths before altering live production pipelines.
Phase 1: Connect and Ingest
Step 1: Create the Connection (Data Cloud Setup)
Begin your Salesforce Data Cloud connector setup by opening Data Cloud Setup in Salesforce.
Select Salesforce Marketing Cloud Engagement from the available connectors to initiate your Data Cloud connector configuration.
Configure the connection using the required authentication credentials.
Verify and save the setup to securely connect both environments.
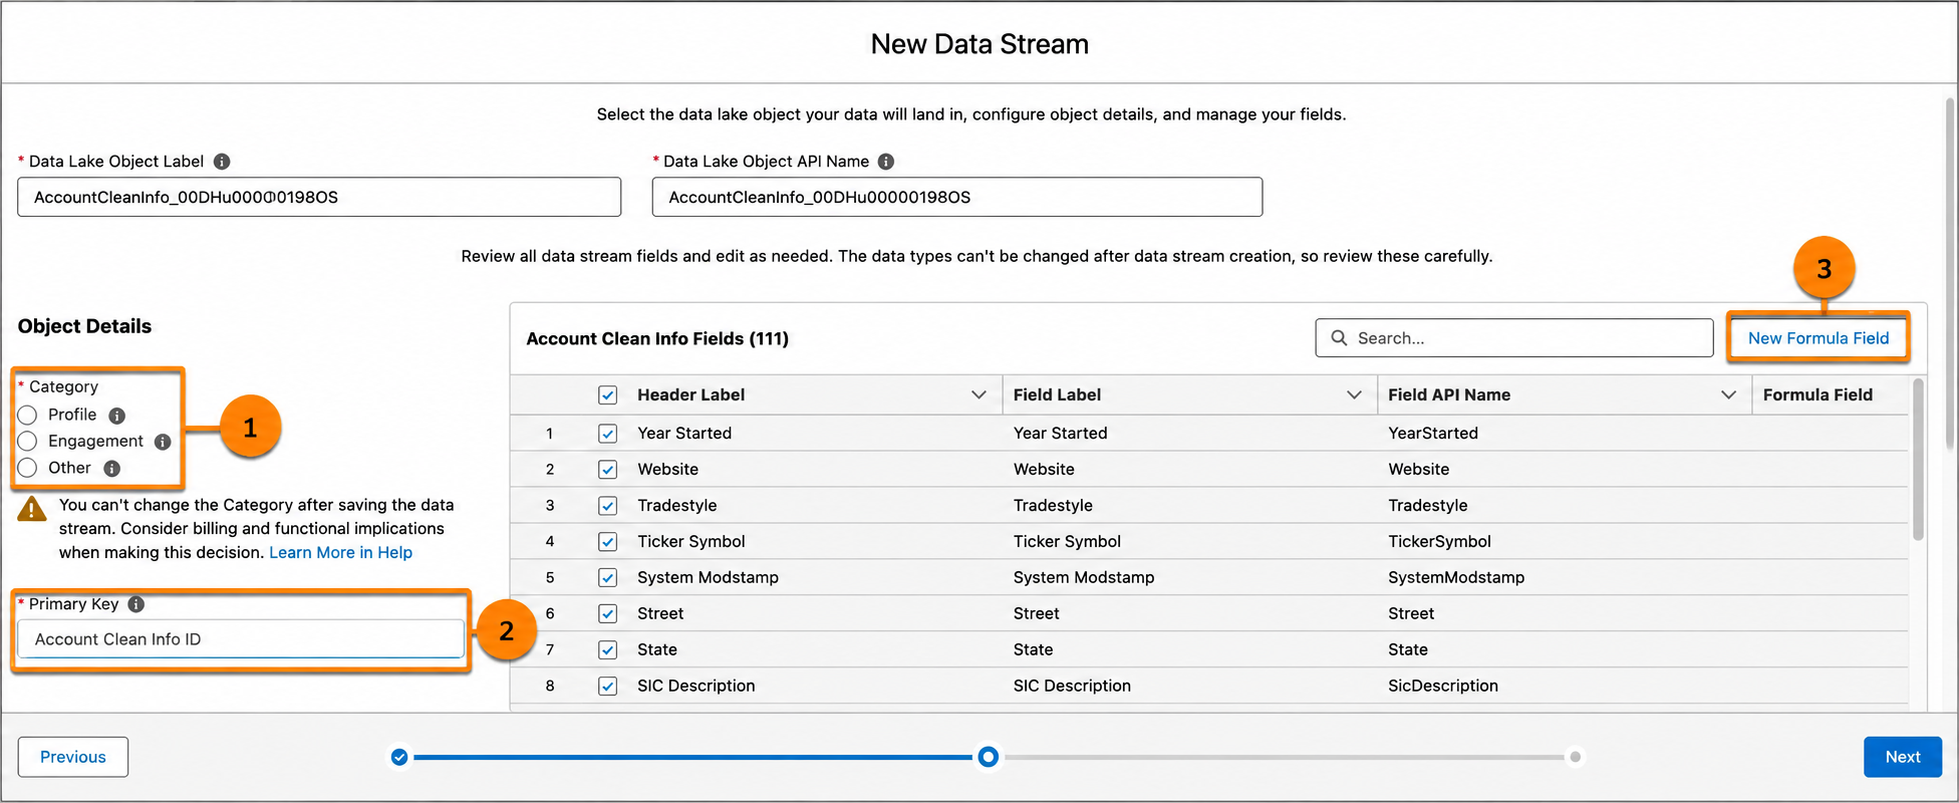
Step 2: Create the Data Stream & Generate DLOs
Go to Data Streams and click New Data Stream to begin your Salesforce Data Stream setup.
Select your connected Marketing Cloud Engagement environment.
Choose the Marketing Cloud Starter Data Bundles, such as Email, SMS, and MobilePush.
Configure the required ingestion settings and activate the data stream.
Data Cloud will automatically create Data Lake Objects (DLOs) to store incoming raw data and metadata.
Step 3: Connect Core Salesforce CRM Data
Complete your Salesforce CRM to Data Cloud integration by creating a separate Data Stream for your Sales Cloud or Service Cloud instance
Select the standard CRM objects, including Lead, Contact, and Account.
Configure the ingestion and synchronization settings.
Save and activate the data stream.
The selected CRM records will be ingested into dedicated CRM Data Lake Objects (DLOs).
Phase 2: Clean and Harmonize
Step 4: Transform Data with Formulas
Open the Formula Editor in Data Cloud.
Select the relevant Data Lake Object (DLO) or data stream.
Create formulas or transformation rules to clean and standardize incoming data.
Normalize fields such as phone numbers, email addresses, and record names.
Apply the transformations and validate the updated data before mapping.
Step 5: Map to the Customer 360 Data Model
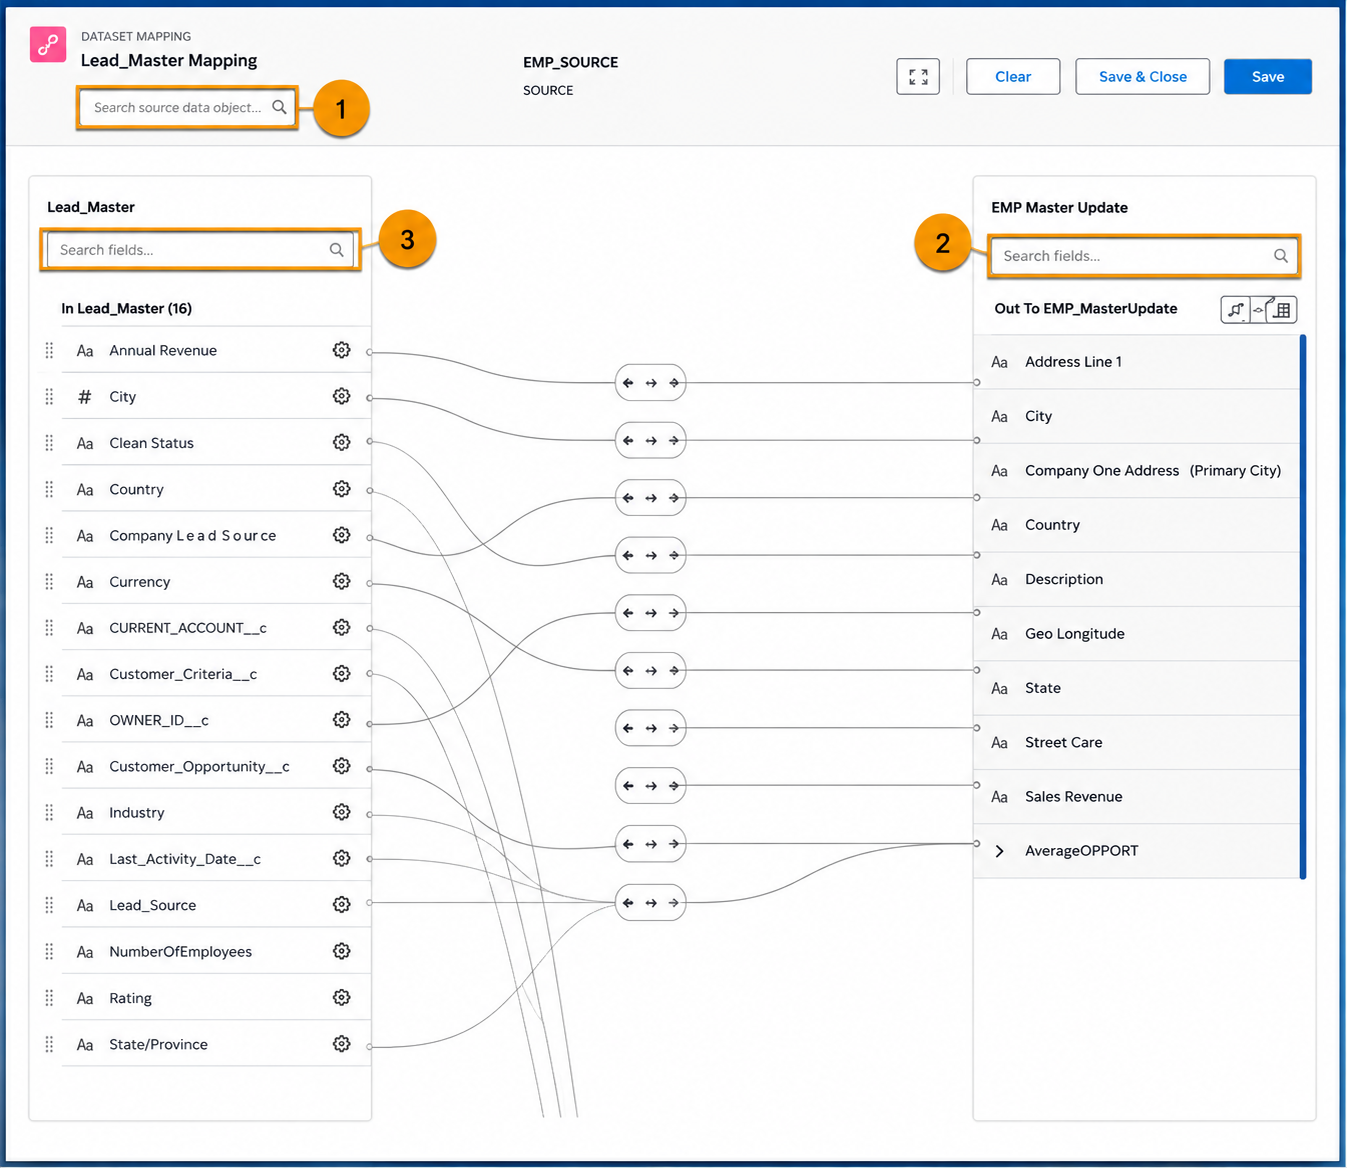
Open the Data Mapping Canvas in Data Cloud.
Select your CRM Contact DLO fields and Marketing Cloud Subscriber DLO fields.
Map the selected fields to the standard Individual Data Model Object (DMO).
Review the mappings to ensure all customer data is aligned correctly.
Save and activate the mappings to harmonize data across all connected sources.
Phase 3: Unify and Activate
Step 6: Configure Identity Resolution Rulesets
Open Identity Resolution in Data Cloud.
Create a new ruleset for customer profile unification.
Define matching criteria such as Exact Email or Normalized Phone Number.
Configure the primary identity using the SubscriberKey.
Save and activate the ruleset to merge duplicate records into unified customer profiles.
Step 7: Rebuild and Target Segments
Open the Segments section in Data Cloud.
Create a new audience segment using the visual drag-and-drop segment builder or Einstein Segment AI.
Query and filter your harmonized Individual DMOs based on customer attributes and behaviors.
Preview, validate, and save the audience results.
Step 8: Define the Activation Target & Publish
Navigate to Activation Targets and create a new target pointing to your Marketing Cloud Engagement instance, selecting the specific Business Units (BUs) that require the data.
Create an Activation for your segment, select your new Activation Target, and map your segment attributes (ensuring the Contact/Subscriber ID is mapped to the Contact Schema).
Publish the activation to automatically generate optimized Shared Data Extensions (SDEs) inside Marketing Cloud Engagement.
Common Pitfalls to Avoid
Messing Up the Subscriber Key
When sending your audience back to Marketing Cloud, you must explicitly link your main customer ID to the primary Subscriber Key. If you miss this step, your marketing emails and journeys simply won't send.
Importing Too Much Trash Data
Data Cloud can hold a lot of information, but importing hundreds of old, unused fields creates a massive mess. Only bring over data you actually plan to use for targeting or personalizing emails.
Forgetting That Audiences Change Automatically
Data Cloud groups update automatically on a schedule. If a customer no longer fits your specific audience rules during an update, they will drop out of the list, which can unexpectedly kick them out of a live marketing campaign.
Conclusion
Moving to the new Salesforce Data Cloud connector is much more than just a basic system cleanup. It completely upgrades your marketing setup by replacing slow, delayed data updates with a fast, real-time foundation. By getting rid of these data delays, you give your team a cleaner workspace and fully prepare your business to use advanced AI tools.
To ensure your deployment aligns with Salesforce Data Cloud best practices, executing a seamless Data Cloud integration requires specialized technical modeling. Our team offers expert Salesforce Data Cloud implementation to help you build a robust infrastructure. Let's connect to transform your pipeline strategy.
Frequently Asked Questions
-
No, as long as you keep a parallel-run window. By leaving the legacy package installed but pausing the object sync, your tracking stays intact while you update live journeys to use the new Data Cloud data extensions.
-
The native connector still uses the old package's underlying API plumbing to send email tracking data back to Data Cloud. You should only pause the object sync inside Contact Builder, not delete the package.
-
Segments update automatically on your set platform schedule. If a customer stops matching your rules during an update, they drop out of the list automatically, so your journeys must be built to handle these changes.
-
Not for core channels. Using the Marketing Cloud Starter Data Bundles (Email, SMS, MobilePush) creates pre-mapped data objects automatically. However, custom CRM fields will still need manual mapping.
Related Reading

Let’s Talk

Drop us a note, we’re happy to take the conversation forward 👇🏻